

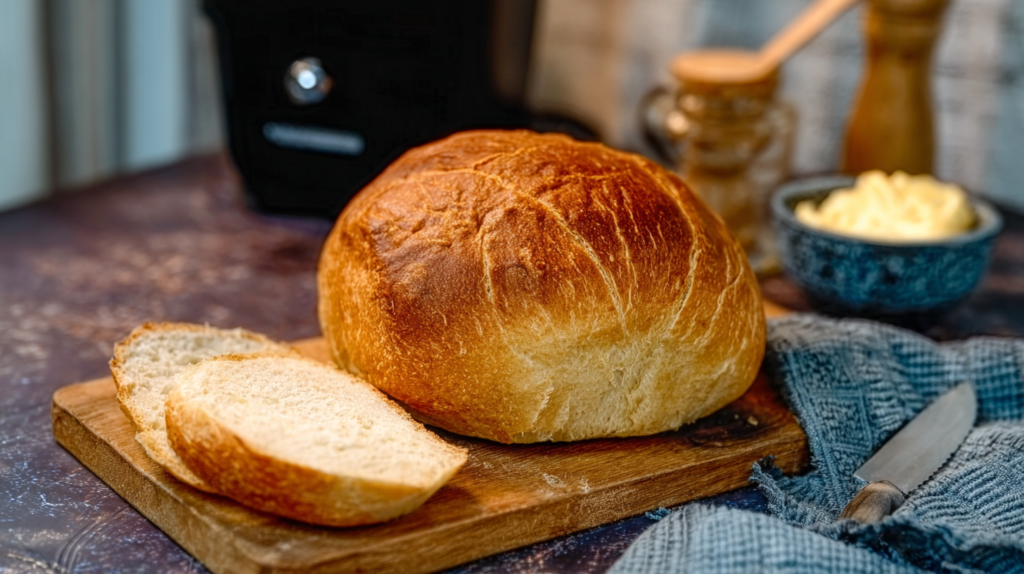
Air-fried bread is a fresh take on baking, utilizing an air fryer instead of a traditional oven. While the idea may seem unusual at first, it’s quickly gaining popularity for its unique advantages. The air fryer circulates hot air around the bread, forming a crispy crust while maintaining a soft, chewy interior—an irresistible texture.
Its convenience is one of the key reasons for its rise in popularity. Unlike conventional baking methods that involve preheating and long cook times, the air fryer simplifies the process, cutting down on both prep and cooking time. Ideal for small kitchens, air fryers offer a compact, efficient alternative.
Additionally, air fryer bread recipes are often simple and require just a few basic ingredients, making them perfect for beginners. With minimal effort, anyone can bake a loaf that tastes as good as it looks, attracting both experienced bakers and novices eager to try this innovative method.
The Benefits of Making Bread in an Air Fryer
Using an air fryer to make Bread offers several benefits that cater to both seasoned bakers and newcomers alike. Here are the key advantages, broken down into simple steps:
- Speed and Efficiency: Air fryers heat up much faster than conventional ovens. This efficiency means you can start baking your loaf almost immediately, saving valuable time in the kitchen. The rapid hot air circulation ensures even cooking and a quicker bake time.
- Crispy Crust with Soft Interior: The unique cooking method of the air fryer creates a delightful texture contrast in your Bread. The outside develops a beautifully crisp crust, similar to what’s achieved with high-temperature baking, while the interior remains tender and fluffy.
- Energy Conservation: Using a smaller appliance with a shorter cooking time consumes less energy than heating a full-sized oven. This environmentally friendly aspect also translates to cost savings on your energy bills.
- Space-Saving: For small apartments or homes with limited kitchen space, air fryers are compact and multifunctional, offering a great alternative to bulky ovens. This means more space for other kitchen activities or gadgets.
- Accessibility for Beginners: Air fryer bread recipes typically involve fewer steps and ingredients, making them less intimidating for novice bakers. Beginners can experiment with a range of recipes without feeling overwhelmed by the complexities of traditional baking.
These benefits make the air fryer an appealing option for those who enjoy fresh, homemade Bread with minimal hassle.
Essential Ingredients for Air Fryer Bread Recipes
Creating a delectable loaf of air fryer bread begins with a handful of essential ingredients. While recipes might vary, the core components often remain the same. Here are the basic ingredients you’ll need to embark on your air fryer bread-making journey:
- Flour: Most recipes use all-purpose flour or bread flour. Bread flour is preferred for its higher protein content, which promotes better gluten formation and a chewier texture.
- Yeast: Active dry yeast or instant yeast are commonly used in bread recipes to help the dough rise. Make sure your yeast is fresh for the best results.
- Water: This is used to hydrate the flour and activate the yeast. The water should be lukewarm, around 110°F, to help the yeast ferment properly.
- Salt is essential for enhancing flavor and controlling yeast activity. It ensures that the dough doesn’t rise too quickly and develops off-flavors.
- Sugar: A small amount is used to feed the yeast, helping it rise and contributing a subtle sweetness to the Bread.
- Oil or Butter: Adding fat to your dough improves its texture, making the Bread softer and more tender.
These staple ingredients form the foundation of most air-fried bread recipes. Having them on hand will prepare you to explore a variety of recipes and bring the magic of fresh-baked Bread into your home every time.
How to Make 3 Ingredient Air Fryer Bread at Home
Making air fryer bread can be incredibly simple, especially with a recipe that requires only three ingredients. Here’s a step-by-step guide to creating homemade Bread in an air fryer.
Ingredients
- 2 cups self-rising flour
- Provides the necessary structure and rise for the Bread.
- 1 cup plain Greek yogurt
- Adds moisture and slight tanginess for flavor.
- One tablespoon of olive oil
- It helps create a moist crumb and adds richness.
Instructions
- Prepare the Dough
- In a large mixing bowl, combine the self-rising flour and Greek yogurt.
- Mix the ingredients until they form a sticky dough. If the mixture is too sticky, add a little more flour.
- Shape the Bread
- Lightly flour your hands and transfer the dough onto a floured surface.
- Knead gently and form the dough into a loaf or your desired shape.
- Preheat the Air Fryer
- Set your air fryer to 350°F (175°C) and allow it to preheat for a few minutes.
- Cook the Bread
- Place the formed dough into the air fryer basket lined with parchment paper.
- Drizzle or brush the top with olive oil for a golden crust.
- Air fry for about 20-25 minutes or until the Bread is golden brown and cooked. Check by inserting a toothpick or skewer; it should come out clean.
- Cool and Serve
- Remove the Bread from the air fryer and let it cool slightly on a wire rack before slicing.
- Enjoy your freshly baked, simple, and delicious air fryer bread!
Step-by-Step Guide to Baking Bread in an Air Fryer
Gather Your Ingredients and Equipment
- Ingredients:
- 2 cups all-purpose flour
- One packet of active dry yeast (or two ¼ teaspoons)
- One teaspoon salt
- One tablespoon sugar
- ¾ cup warm water
- One tablespoon of olive oil (optional)
- Equipment:
- Air fryer
- Mixing bowls
- Spoon or spatula
- Clean kitchen towel
- Air fryer-safe baking dish or parchment paper
Prepare the Dough
- Activate the Yeast:
- In a small bowl, dissolve sugar into ¾ cup warm water.
- Sprinkle in the yeast and allow it to sit for about 5 minutes until it becomes frothy.
- Mix the Dough:
- In a large mixing bowl, combine the flour and salt.
- Pour the yeast mixture into the flour and stir to form a shaggy dough.
- If using, add olive oil for extra flavor and softness.
- Knead the Dough:
- Turn the dough onto a floured surface and knead for 8-10 minutes until smooth and elastic.
- Add more flour if the dough is too sticky.
Let the Dough Rise
- Place the kneaded dough in a lightly oiled bowl, cover it with a kitchen towel, and let it rise in a warm area for about one hour or until it doubles.
Shape and Prepare for Baking
- Deflate and Shape:
- Punch down the risen dough to remove excess air.
- Shape it into a loaf or divide it into smaller pieces for rolls.
- Prepare the Air Fryer:
- Line the air fryer basket with parchment paper or place a baking dish for the bread inside the basket.
Bake the Bread
- Preheat the air fryer to 350°F (175°C).
- Carefully place the shaped dough in the air fryer.
- Bake for 20-25 minutes for a loaf or 15-20 minutes for rolls until the Bread is golden brown and sounds hollow when tapped on the bottom.
Cool and Enjoy
- Once baked, remove the Bread from the air fryer and let it cool on a wire rack before slicing. Enjoy your freshly baked air fryer bread!
How Long to Bake Bread in an Air Fryer: Timing Tips and Tricks
Baking bread in an air fryer is convenient and requires a keen eye on timing to achieve the perfect loaf. Here are some tips and tricks to help you get it right every time:
- Preheat Your Air Fryer: Preheating your air fryer is crucial, just like with a traditional oven. It helps create a consistent baking environment. Aim for a temperature of around 350°F (175°C).
- Monitor the Baking Time: Air fryers cook faster than conventional ovens, so checking your Bread regularly is essential. For most recipes, a baking time between 15 and 25 minutes should suffice.
- Adjust Based on Size: The size and shape of your Bread can affect baking time. Smaller rolls may take as little as 12-15 minutes, while a larger loaf requires 20-25 minutes. Adjust accordingly.
- Check for Doneness: Use a toothpick or skewer to test whether your Bread is fully baked. Insert it into the center of the Bread—if it comes out clean or with only a few crumbs, your Bread is ready.
- Consider the Ingredients: The type of dough and ingredients used can influence baking time. For example, recipes without yeast might bake faster than those with yeast. Always follow the specific guidance of your recipe.
- Allow for Cooling: Once the Bread has finished baking, remove it from the air fryer and let it cool on a rack. This step allows moisture to escape, preventing a soggy texture.
Following these steps, you can consistently bake delicious Bread in your air fryer.
Delicious Air Fryer Bread Recipes You Must Try
Classic White Bread
- Ingredients:
- 2 cups all-purpose flour
- One packet of instant yeast
- One tablespoon sugar
- One teaspoon salt
- 1 cup warm water
- Instructions:
- Combine flour, yeast, sugar, and salt in a mixing bowl.
- Gradually add warm water until a dough forms.
- Knead the dough on a floured surface until smooth.
- Shape into a loaf and let rise for 30 minutes.
- Bake in preheated air fryer at 350°F (175°C) for 20 minutes.
Herb and Garlic Rolls
- Ingredients:
- 2 cups bread flour
- One packet of active dry yeast
- One teaspoon sugar
- One teaspoon salt
- One tablespoon of olive oil
- 1 cup warm water
- One tablespoon of dried herbs (rosemary, thyme)
- Two cloves garlic, minced
- Instructions:
- Mix flour, yeast, sugar, and salt in a bowl.
- Add olive oil and water, then stir in herbs and garlic.
- Knead the dough until smooth and elastic.
- Divide into rolls and let rise for 20 minutes.
- Bake in an air fryer at 350°F (175°C) for 15 minutes.
Cinnamon Raisin Bread
- Ingredients:
- 2 ½ cups all-purpose flour
- 1½ teaspoons cinnamon
- One packet of instant yeast
- Two tablespoons sugar
- One teaspoon salt
- ¾ cup warm milk
- ¼ cup melted butter
- ½ cup raisins
- Instructions:
- Combine flour, cinnamon, yeast, sugar, and salt in a bowl.
- Add warm milk and butter, mixing to form a dough.
- Fold in raisins and knead until evenly distributed.
- Let dough rise for 1 hour, then bake at 350°F (175°C) for 25 minutes.
Whole Wheat Bread
- Ingredients:
- 3 cups whole wheat flour
- One packet of instant yeast
- Two tablespoons honey
- One teaspoon salt
- 1 ½ cups warm water
- Instructions:
- Mix flour, yeast, honey, and salt in a large bowl.
- Gradually add warm water, stirring until a dough forms.
- Knead on a floured surface until smooth and stretchy.
- Shape dough into a loaf and let rise for 45 minutes.
- Bake in preheated air fryer at 350°F (175°C) for 20 minutes.
Easy Air Fryer Bread Rolls for Beginners
Ingredients
- 2 cups all-purpose flour
- One tablespoon of instant yeast
- One teaspoon salt
- One tablespoon sugar
- 1 cup warm water
- Two tablespoons of olive oil
Instructions
- Prepare the Dough
- In a large mixing bowl, combine flour, sugar, and salt.
- In a separate small bowl, dissolve the yeast in warm water and let it sit for about 5 minutes until frothy.
- Gradually add the yeast mixture and olive oil to the flour mix, stirring until a dough forms.
- Knead and Rise
- Turn the dough onto a floured surface and knead for 5 to 7 minutes until smooth and elastic.
- Shape the dough into a ball and place it in a greased bowl, covering it with a damp cloth. Allow it to rise in a warm place until doubled in size, approximately one hour.
- Shape the Rolls
- Punch down the risen dough and divide it into 8-10 equal pieces.
- Shape each piece into a round ball and place them on a baking sheet lined with parchment paper.
- Prepare to Bake
- Preheat your air fryer to 350°F (175°C).
- Let the rolls rest for 10-15 minutes, allowing them to puff up slightly.
- Bake in the Air Fryer
- Carefully place the rolls in the air fryer basket, ensuring they aren’t manageable.
- Bake for 10-15 minutes until the rolls are golden brown and sound hollow when tapped on the bottom.
- Cool and Serve
- Remove the bread rolls from the air fryer and let them cool on a wire rack.
- Serve warm with butter or as a side to your favorite meal.
These easy air fryer bread rolls are perfect for beginners and make a delightful addition to any meal. Enjoy the warm, homemade taste with minimal effort!
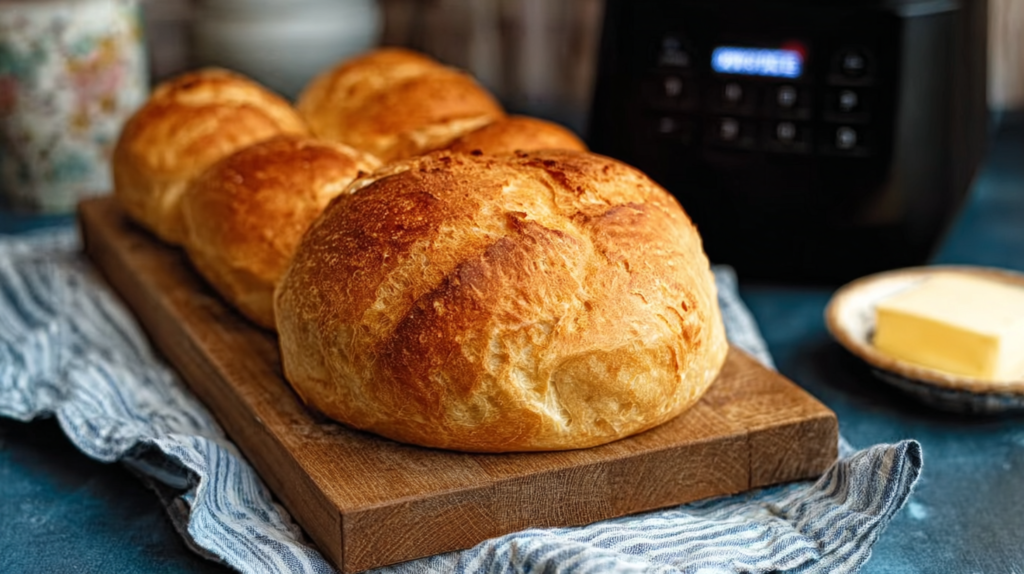
Ninja Air Fryer Bread Specific Tips for Perfect Results
A Ninja Air Fryer for baking bread can deliver consistently delightful results with just a few tailored tips and steps. Here’s how to perfect your air fryer baking:
- Preheat Your Air Fryer: To ensure even cooking, begin by preheating the Ninja Air Fryer for about 3-5 minutes at the recommended baking temperature, usually 350°F (175°C).
- Choose the Right Pan: Use an air fryer-safe baking pan or line the basket with parchment paper to prevent sticking and allow easy bread removal once it’s done.
- Optimal Dough Placement: Shape your dough appropriately to fit comfortably in the air fryer. Avoid overcrowding, as this can prevent proper air circulation and even cooking.
- Monitor Cooking Times: Bread baking times may vary slightly due to model specifications. Begin checking for doneness a few minutes before the recipe’s suggested time by inserting a toothpick or skewer into the Bread to see if it comes out clean.
- Avoid Frequent Opening: Resist the temptation to open the Ninja Air Fryer repeatedly, as this can let out hot air and may affect the rising and texture of the Bread.
- Use Steam for Crustier Bread: For a crispier crust, lightly spray or mist the top of your dough with water before starting the air-frying process.
- Cool Properly: Once done, allow the Bread to cool on a wire rack. This prevents condensation from forming on the bottom, keeping your Bread from getting soggy.
Following these steps, you can achieve perfect Bread with a delightful crust and soft interior, making the most of your Ninja Air Fryer.
Baking Air Fryer Bread Without Yeast: A Complete Guide
Baking bread without yeast is a fantastic option when you’re short on time or ingredients, and an air fryer simplifies the process. Follow these steps to create delicious, yeast-free Bread that’s ready in no time.
- Gather Your Ingredients: Start with the basics—flour, baking powder, salt, and any additional spices or flavorings you prefer. Common choices include herbs, garlic powder, or cheese to add extra taste to your Bread.
- Mix the Dry Ingredients: In a large mixing bowl, combine the flour, baking powder, and salt. Stir these dry ingredients together until well incorporated.
- Add the Liquid: Slowly add your chosen liquid, often water or milk, to the dry ingredients. For added flavor, consider using buttermilk or a splash of vinegar for tanginess. Mix until a shaggy dough forms.
- Knead the Dough: Turn the dough onto a lightly floured surface and knead it gently for a few minutes. The dough should be smooth and elastic but not overly sticky.
- Shape the Dough: Once the dough is properly kneaded, divide it into a loaf or into smaller rolls. Ensure your shapes fit comfortably in your air fryer basket.
- Prepare the Air Fryer: Preheat your air fryer to 350°F (175°C) and line the basket with parchment paper to prevent sticking.
- Bake the Bread: Place the shaped dough in the air fryer basket, allowing space for expansion. Bake for 15-20 minutes, checking around the 15-minute mark to ensure the Bread doesn’t overcook.
- Cool and Enjoy: Once the Bread is golden brown and cooked, remove it from the air fryer and let it cool on a wire rack. Enjoy your yeast-free Bread as a quick snack or a side with meals.
Following these steps, you can whip up a tasty loaf without yeast, saving time without sacrificing flavor or texture.
How to Make Air Fryer Bread with Yeast for Fluffy Loaves
Creating fluffy loaves with your air fryer is simple and rewarding. Follow these steps and tips for perfect results every time.
Ingredients
- 2 cups all-purpose flour
- One packet (2 ¼ teaspoons) of active dry yeast
- One tablespoon sugar
- One teaspoon salt
- ¾ cup warm water (around 110°F or 43°C)
- One tablespoon of olive oil or melted butter
Steps to Follow
- Activate the Yeast
- Dissolve the sugar in warm water in a small bowl.
- Add the yeast and let it sit for about 5 minutes until it becomes bubbly and foamy.
- Prepare the Dough
- In a large bowl, mix the flour and salt.
- Add the yeast mixture and olive oil to the dry ingredients.
- Stir until a dough forms.
- Knead the Dough
- Transfer the dough to a lightly floured surface.
- Knead for about 5-10 minutes until smooth and elastic.
- First Rise
- Place the dough in a greased bowl, cover it with a clean cloth, and let it rise in a warm place for 1-2 hours or until doubled in size.
- Shape and Second Rise
- Punch down the dough and shape it into a loaf or rolls.
- Place shaped dough on a parchment paper-lined air fryer basket.
- Cover and let rise again for about 30 minutes.
- Bake in the Air Fryer
- Preheat the air fryer to 350°F (175°C).
- Bake the Bread for 15-20 minutes until golden brown and hollow-sounding when tapped.
- Cool and Serve
- Let the Bread cool on a wire rack before slicing.
- Enjoy your fluffy, homemade air fryer bread!
By following these steps, you can enjoy the delight of fresh, fluffy Bread made in your air fryer, perfect for sandwiches or a delicious side dish.
3 Ingredient Air Fryer Bread with Yeast: Simple and Quick Recipe
Ingredients
- All-Purpose Flour: 2 cups
- Instant Yeast: 1 packet (approximately 2 1/4 teaspoons)
- Warm Water: 1 cup
Instructions
- Mix the Ingredients: Combine the all-purpose flour and instant yeast in a large mixing bowl. Gradually add the warm water, stirring continuously until a dough forms.
- Knead the Dough: Transfer the dough onto a floured surface. Knead the dough for about 5 minutes until it becomes smooth and elastic.
- Allow to Rise: Place the dough in a lightly greased bowl, cover it with a clean cloth, and let it rise in a warm spot for about one hour or until it doubles.
- Shape the Dough: Once risen, punch down the dough to remove excess air. Depending on your preference, shape it into a loaf or divide it into rolls.
- Preheat the Air Fryer: Preheat your air fryer to 350°F (175°C) to ensure even cooking.
- Bake the Bread: Line the air fryer basket with parchment paper and place the shaped dough inside. Bake for 15-20 minutes, checking for a golden-brown crust.
- Cool and Serve: Once baked, remove the Bread from the air fryer and let it cool on a wire rack before slicing and serving.
With just three basic ingredients and minimal effort, this bread recipe provides a quick and delicious way to enjoy homemade Bread. Adjust the baking time slightly based on your air fryer model for best results.
Common Mistakes to Avoid When Making Bread in an Air Fryer
While air fryer bread-making can be straightforward, certain pitfalls can affect your results. Here are common mistakes to avoid:
- Skipping Preheating: Not preheating the air fryer can lead to uneven baking and an unsatisfactory texture. Ensure your air fryer is at the correct temperature before adding the dough.
- Overcrowding the Basket: Placing too much dough in the air fryer basket restricts airflow, which is crucial for optimal baking. Ensure there’s enough space around each piece for even cooking.
- Incorrect Dough Moisture: Too wet or dry dough can result in poor texture. Follow recipe measurements carefully and adjust by adding small amounts of flour or water as needed to achieve the right consistency.
- Ignoring Rising Time: Yeast-based breads need adequate rising time for a fluffy texture. Rushing this process can result in dense Bread. Allow the dough to rise until it doubles for the best results.
- Inaccurate Temperature Settings: Setting the wrong temperature can lead to overbaked or undercooked Bread. Ensure your air fryer is set to the recommended temperature for the specific type of Bread you’re preparing.
By avoiding these mistakes, you can ensure that your air fryer bread-making experience is successful and that you produce delicious, perfectly baked Bread every time.
Comparing Air Fryer Bread with Traditional Oven-Baked Bread
| Feature | Air Fryer Bread | Traditional Oven-Baked Bread |
|---|---|---|
| Cooking Time | Generally faster, as the air fryer heats up quickly | Typically longer due to preheating and larger size |
| Texture | Crispier crust and can be denser depending on recipe | Softer crust and usually more airy depending on recipe |
| Energy Use | More energy-efficient due to smaller appliance size | Higher energy consumption with large ovens |
| Convenience | Easier cleanup, compact, and quick to prep | Requires more preparation and cleaning effort |
| Batch Size | Suitable for small batches or single loaves | Can handle larger batches and multiple loaves |
| Flavor Variations | Limited space for incorporating large toppings or fillings | More flexibility with larger space for additional ingredients |
Both methods have unique benefits, catering to different baking needs and preferences. Air fryer bread excels in speed and energy efficiency, making it a practical choice for small households or quick preparations. In contrast, traditional oven-baked bread is ideal for larger gatherings and offers expansive recipe flexibility.
Conclusion
Mastering the art of making bread in an air fryer opens up a world of culinary possibilities, combining convenience with quality results. Whether you’re a seasoned baker or a newcomer to bread-making, an air fryer provides a quick and efficient way to enjoy freshly baked bread with minimal effort. From yeast-free options to traditional yeast loaves and beyond, there are countless recipes to explore and experiment with.
Understanding the nuances of your specific air fryer and applying the tips shared here will help you overcome common challenges and achieve consistently delicious outcomes. Ultimately, whether you prefer the unique texture of air fryer bread or the traditional feel of an oven-baked loaf, both methods offer delightful avenues for creating homemade bread that will delight your taste buds and elevate any meal.
FAQs
Can I use any type of flour for air fryer bread?
Yes, you can use different types of flour, including all-purpose, whole wheat, or gluten-free blends, depending on your dietary needs and preferences. Keep in mind that different flours may affect the texture and flavor of the bread, so feel free to experiment to find what you like best.
Is it necessary to preheat the air fryer before baking bread?
Preheating the air fryer is recommended as it ensures even cooking and helps the dough rise properly. This is similar to preheating a traditional oven before baking.
How can I prevent my bread from sticking to the air fryer basket?
To prevent sticking, you can line the air fryer basket with parchment paper or use a silicone mat. Additionally, lightly greasing the basket can help, but ensure it is compatible with your air fryer model.
What is the best way to store air fryer bread after baking?
To keep your air fryer bread fresh, allow it to cool completely before storing it in an airtight container. You can store it at room temperature for a couple of days or refrigerate it for up to a week. For longer storage, consider freezing the bread.
Can I bake large loaves of bread in an air fryer?
While air fryers typically have a smaller capacity than traditional ovens, you can still bake medium-sized loaves. If you’re making larger loaves, consider dividing the dough into smaller portions or baking in multiple batches to ensure even cooking.